

Table of Contents
Why Oracle to SQL Server Migration ?
Oracle and SQL Server are two popular relational database management systems (RDBMS) that are commonly utilized to operate enterprise applications. Oracle has a high price tag, as well as additional charges if you use services such as Oracle enterprise manager or data guard. SQL Server, on the other hand, includes all database capabilities in a single licensing cost, whether it’s the database engine, Reporting Services, or Analysis Services. SQL Server has also proven its reliability and power in handling large data processing loads and running mission-critical corporate applications. For their applications, many clients are now selecting SQL Server over Oracle.
Many customers are looking to save their technological costs these days. One strategy to save costs is to choose cost-effective technologies and software that are equally capable and powerful in meeting needs. Databases are one of the tiers on which clients spend a significant amount of money in licence and maintenance costs. The cost of employing support employees to manage these databases is an added expense. When compared to Oracle, SQL Server is far more cost-effective, which is one of the key reasons why clients prefer SQL Server to Oracle. I’ll show you how to migrate your existing Oracle databases to SQL Server step by step in this article.
Some points to remember:
- You can encounter some oracle to sql server migration challenges like permissions etc.. keep an open mind and try the migration in Development environment first and make list of permissions and steps.
- oracle to sql server migration best practices are always to make sure the steps are noted in development environment and through testing of applications relying on this database before doing in production.
- Next we will cover azure oracle to sql server migration in next tutorial in few days.
- Make sure both oracle to sql server migration online instances are up and running.
- We can also do a oracle to sql server migration without ssma by doing steps by step exploring of schemas, functions, procedures, views, triggers etc… but is prone to error and very long and tedious process.
- The SSMA sql server migration assistant for oracle is best tool for migration and generation of report of migration at the end.
The Step by Step approach below
Pre-requisites
- Ensure that the program can run and process on SQL Server.
- Understand the Oracle database functionalities in use and discover a SQL Server feature that can be utilized to replace them.
- Check to see whether there is an option in SQL Server for the data types used in Oracle.
If you meet all three of the aforementioned pre-requisites, you can begin planning your migration. To assist with such migrations, Microsoft has developed a tool called SQL Server Migration Assistant (SSMA) for Oracle. This utility can be used to migrate SQL Server databases as well as Azure SQL databases to SQL Server. I’ve utilized it to help us with our migrations.
I’m using SQL Server 2014 to migrate an Oracle 10G database. Because of some application compatibility difficulties, we used SQL Server 2014, and we plan to upgrade this instance after the move. The steps outlined in this article, however, are also applicable to other SQL Server versions.
I would recommend starting with a smaller life cycle system to ensure that you understand the process and any potential complications that may develop.
The following is a high-level strategy for this migration:
First, you must install SQL Server on the target server, which will host your migrated database. Ascertain that the source Oracle server and the target SQL Server system are connected and accessible.
- The Oracle Client and SQL Server Migration Assistance (SSMA) must be installed on that server.
- Connect to the source Oracle database via SSMA. Check for connectivity issues caused by port or firewall issues if any and resolve.
- Connect to the SQL Server target that you set up in step 1 Ma
- Objects from Oracle should be mappedto/ converted to SQL Server.
- Load SQL Server objects that have been transformed.
- Finally, move the data from the source database to the target database.
Step by Step guide for migration
1. Install SQL Server Migration Assistant for Oracle on the Server(SQL Server) to be used for migration.
2.Make sure SQL Server Migration Assistant for Oracle Extension Pack is installed. Very straight forward.
3.Run SSMA and connect to the Oracle database source.
![]()
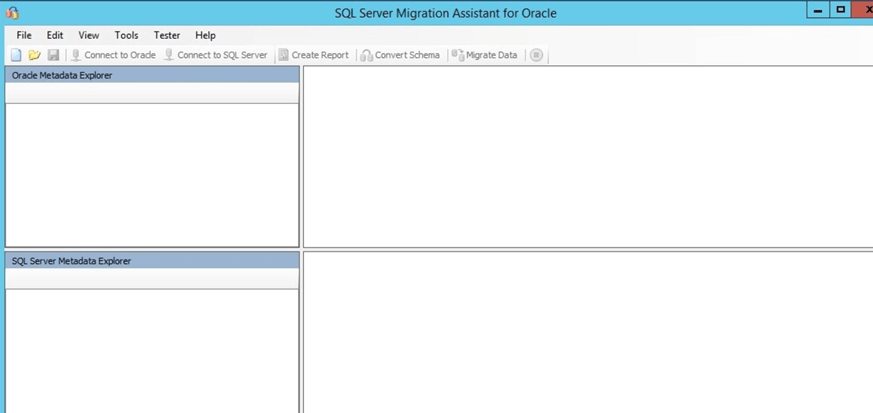
4. In the screenshot below, you can see two boxes. The Oracle Metadata Explorer in the top box will be used to access Oracle source databases, while the SQL Server databases will be accessed in the bottom part. Each box’s right side contains information about their individual database systems.
5. In the SSMA, create a project. To migrate Oracle databases to SQL Server, we must first construct an SSMA project. This project contains all of the necessary information for the migration.
In this project file, the following information will be saved:
Information about the Oracle databases that you intend to convert to SQL Server.
Metadata about the SQL Server instance that will be receiving the transferred objects and data.
Information about the SQL Server connection
Configuration of the project
Choose “New Project” from the “File” tab of the above screenshot, as seen in the screenshot below.
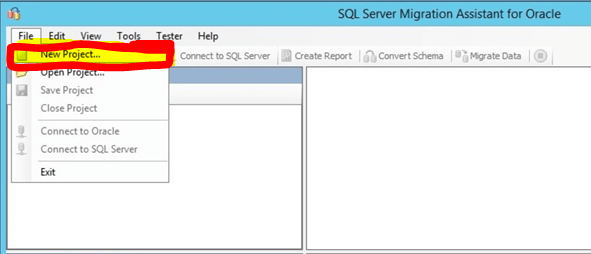
We must first create an SSMA project in order to transfer Oracle databases to SQL Server. This project includes all of the information required for the migration.
The project name is given in the SSMA tool. After that, we’ll use SSMA to connect to the source and target databases. The choices to “Connect to Oracle” and “Connect to SQL Server” are now enabled.
6.You may encounter permission issues when accessing the Oracle database, so make sure the ID you’re using to migrate this database has common rights like connect, read etc… or use a database owner. (do not use production database directly)
7.The Output window has two tabs, one is for output and another one for the error list. This tab will list all errors that appear during the migration at the bottom left.
A green progress bar indicates that something is being processed. This green bar will also show the proportion of the evaluation that has been completed. As you can see in the graph below, 21% of the work has already been finished.
SSMA reads the database metadata and adds it to the project file during this part of the evaluation. When SSMA translates objects to SQL Server syntax and migrates data to SQL Server, it uses this metadata. In the Oracle Metadata Explorer window, you may look through this metadata and look at the properties of individual database objects.
8.Connect to the SQL Server you installed as a target. It’s now time to establish a connection to our target system, SQL Server. On the top ribbon of the SSMA tool, select the “Connect to SQL Server” option. A window with connection details will appear. To establish the connection, enter the server details and click the connect button. For this migration, make sure you’re using the sysadmin account.
9. The Oracle schema is need to be mapped to the SQL Server schema. An Oracle database, as we all know, has one or more schemas. SSMA migrates all Oracle schema objects to a SQL Server database named after the schema by default. However, the mapping between Oracle schemas and SQL Server databases can be customized as per our needs.
In Oracle metadata explorer, expand Schema and pick the schema you want to move. If you want to migrate the entire schema, click the box; if you only want to migrate one object, pick it.
When it comes to schema, there is a distinction between Oracle and SQL Server. The Oracle concept of a schema maps to the SQL Server concept of a database and one of the schemas in it.
The Schema Mapping tab with the other 3 tabs will be visible when you select an individual database, the Schemas folder. The list in the Schema Mapping tab is customized for the selected object in our tab.
Conclusion:
If we wish to study the conversion of Oracle objects to SQL Server objects, we can use SSMA for Oracle to generate a conversion report. This is an optional step, however I would recommend completing it before moving on to the next ones.
To create the conversion report, open Oracle Metadata Explorer, right-click on the recognized schema name and select “Create Report” from the menu.